View Apache Struts Jar File File Upload
- Details
- Written by
- Terminal Updated on 03 August 2019 | Print E-mail
This tutorial provides a stride by stride guide on how to implement upload file functionality with Struts framework. With Struts, uploading files is easy to implement since the framework provides fileUpload interceptor which intercepts multipart request and makes uploaded files automatically bachelor for Struts action class.
We are going to build a simple Coffee web awarding based on Struts framework using Eclipse IDE. It provides a simple upload form in which the user can choice up a file to upload. The application will be deployed on Tomcat server, and the uploaded file will be copied to a specific directory on the server.
Suppose you have these pieces of software installed on your computer:
-
- Struts framework distribution (Download Struts).
- Log4J distribution (Download Log4J i.2.17)
- Eclipse IDE for Java EE Developers (Download Eclipse Juno 4.ii).
- Tomcat server (Download Tomcat seven.0).
Tabular array of content:
1. Setup Eclipse project
2. Configure Tomcat
three. Configure web.xml
4. Configure log4j
5. Configure Struts
6. Code file upload form
vii. Code Struts activity class
8. Code issue page
ix. Examination the Struts File Upload application
x. References
one. Setup Eclipse project
1.1. Create new project
In Eclipse IDE, switch to Java EE perspective. Select File > New > Dynamic Web Projection from main carte.
In the New Dynamic Web Project dialog:
- In the field Project name: type StrutsFileUploader
- Under the section Dynamic spider web module version, brand sure 3.0 is selected.
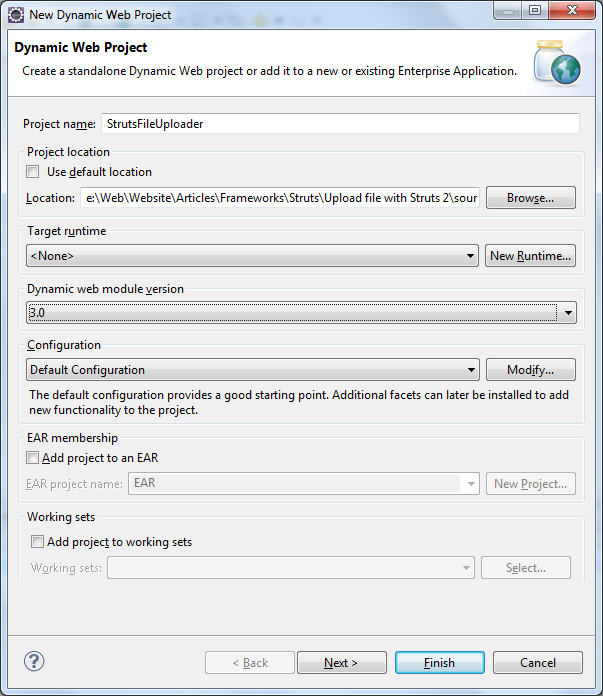
Click Finish, Eclipse will create some bare bone stuff for the projection.
one.two. Create Java package
Right click on src under Java Resources, select New > Package. In the dialog New Java Package, type com.struts.upload into the Name field:
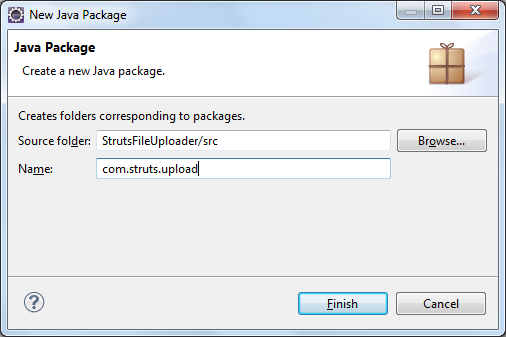
Click Finish to create the package. We will place our Java code in this package.
1.3. Copy Struts JAR libraries
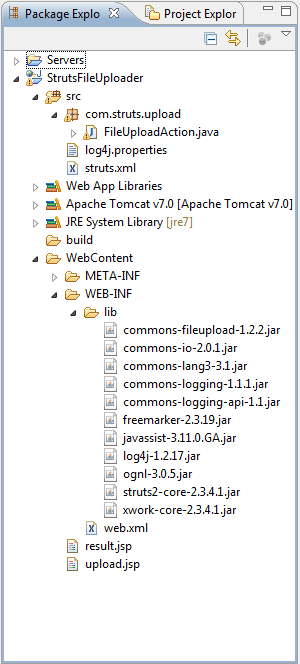
Unpack Struts distribution archive. Copy the following jar files from Struts distribution's lib directory to project'south WEB-INF/lib directory:
-
-
- commons-fileupload-1.2.2.jar
- eatables-io-2.0.1.jar
- commons-lang3-3.1.jar
- commons-logging-ane.1.1.jar
- eatables-logging-api-1.1.jar
- freemarker-ii.three.xix.jar
- javassist-3.11.0.GA.jar
- ognl-three.0.5.jar
- struts2-core-2.3.4.1.jar
- xwork-core-2.3.iv.1.jar
-
Struts uses Log4J for outputting logging data, then nosotros need to add together Log4J's library JAR file also, copy log4j-1.2.17.jar file from Log4J distribution directory to Spider web-INF/lib directory.
So far the project structure in Project Explorer view looks like the following:
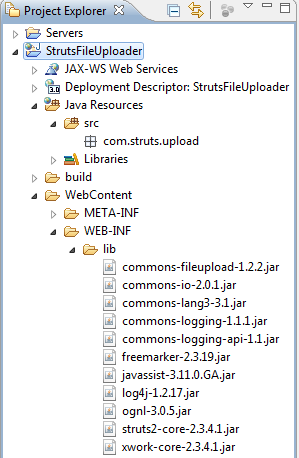
Next, we will configure Tomcat server.
2. Configure Tomcat
Nosotros need to add together a server to the project in gild to automatically deploy and run the web application right inside Eclipse. Switch to Servers view in the workspace (or by select card Window > Evidence View > Servers). Click on the link new server wizard:

The New Server dialog appears. The get-go step is to select a server type. Expand the entry Apache and select Tomcat v7.0 Server:
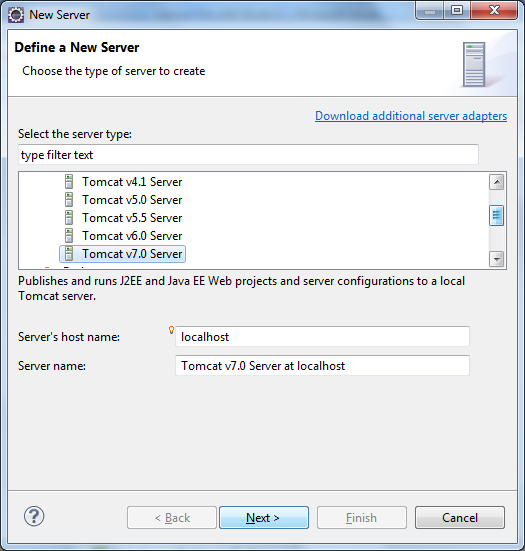
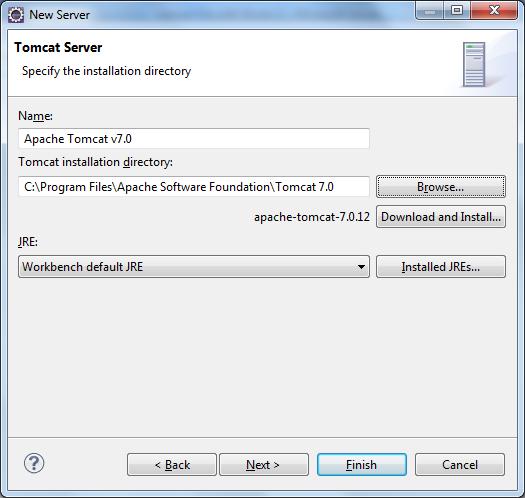
Click Side by side. In the next screen, Tomcat Server, click Scan push to specify Tomcat installation directory (which is ordinarily nether c:\Program Files\Apache Software Foundation\Tomcat 7.0 on Windows):
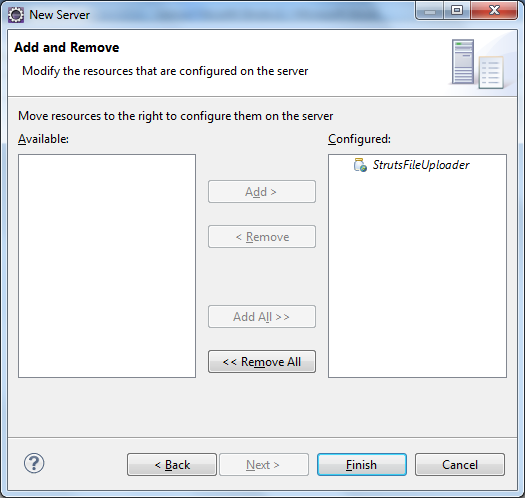
Click Adjacent. In the next screen, Add together and Remove, we add the application to be deployed on the server. Select StrutsFileUploader nether Available section, Click Add button to move the application to the Configured section:
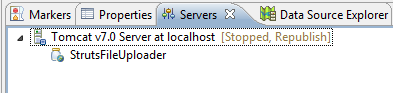
Click Finish. You should encounter Tomcat v7.0 Server at localhost is added in the Servers view:
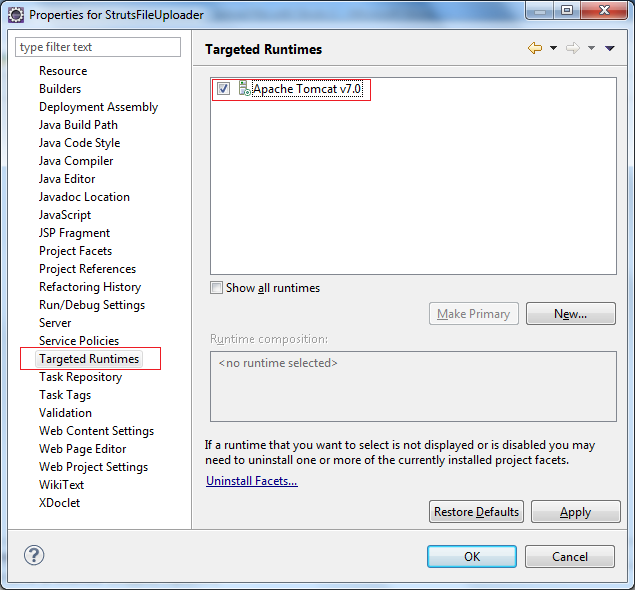
Next, nosotros demand to configure Eclipse to choose Tomcat v7.0 every bit targeted runtime, so all server libraries such as Servlet API will exist bachelor to the project. To do this, select Projection > Properties. In the dialog Properties for StrutsFileUploader, select Targeted Runtimes on the right column, and so check Apache Tomcat v7.0 on the top right:
Click OK to close the dialog. We have finished configure the server. Next, nosotros will configure Struts framework for the project.
4. Configure Struts in spider web.xml
Outset, it requires creating a web deployment descriptor file (web.xml). Select File > New > File from main card. In the dialog New File:
- Select Spider web-INF under WebContent directory.
- Type web.xml into File proper name field.
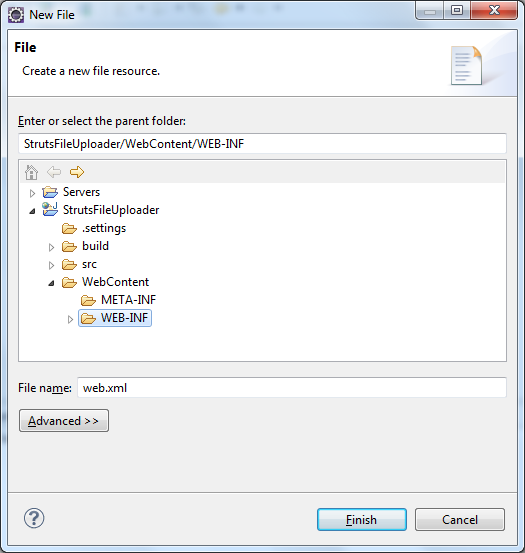
Click Finish. Paste the following code into the spider web.xml file'south editor window:
<?xml version="i.0" encoding="UTF-8"?> <web-app id="WebApp_ID" version="ii.4" xmlns="http://java.sun.com/xml/ns/j2ee" xmlns:xsi="http://www.w3.org/2001/XMLSchema-instance" xsi:schemaLocation="http://java.lord's day.com/xml/ns/j2ee http://java.lord's day.com/xml/ns/j2ee/web-app_2_4.xsd"> <display-name>Strut2 File Upload</display-proper name> <welcome-file-listing> <welcome-file>upload.jsp</welcome-file> </welcome-file-list> <filter> <filter-name>struts2</filter-proper name> <filter-class>org.apache.struts2.dispatcher.ng.filter.StrutsPrepareAndExecuteFilter</filter-class> </filter> <filter-mapping> <filter-name>struts2</filter-name> <url-pattern>/*</url-pattern> </filter-mapping> </web-app>
The <welcome-file> tag specifies that when the application is accessed by its base of operations URL (i.eastward http://localhost/Struts2FileUpload) the upload.jsp page is loaded.
The <filter-mapping> section specifies that all URL (denoted by /*) volition be processed by Struts filter which is divers by <filter> department.
4. Configure log4j
Create log4j.properties file nether src directory and paste the following content:
# LOG4J configuration log4j.rootLogger=DEBUG, Appender1,Appender2 log4j.appender.Appender2.layout.ConversionPattern=%-5p %d [%t] %c %10 - %one thousand%n log4j.appender.Appender2=org.apache.log4j.RollingFileAppender log4j.appender.Appender1=org.apache.log4j.ConsoleAppender log4j.appender.Appender2.File=strut2_fileupload.log log4j.appender.Appender1.layout=org.apache.log4j.PatternLayout log4j.appender.Appender2.layout=org.apache.log4j.PatternLayout log4j.appender.Appender1.layout.ConversionPattern=%-5p%d [%t] %c %10 - %k%n
Nosotros specify ii logging appenders, one or console logging, and another for file logging – which writes logging information to the file struts2_fileupload.log
5. Configure Struts in struts.xml
We will create Struts configuration file, struts.xml, to specify the action that handles file upload with its input page and upshot folio, and some interceptors which intercepts the HTTP asking for processing file upload.
Correct click on src folder, select New > Other… from context menu. Type xml into the search field, transport select XML File in the list:
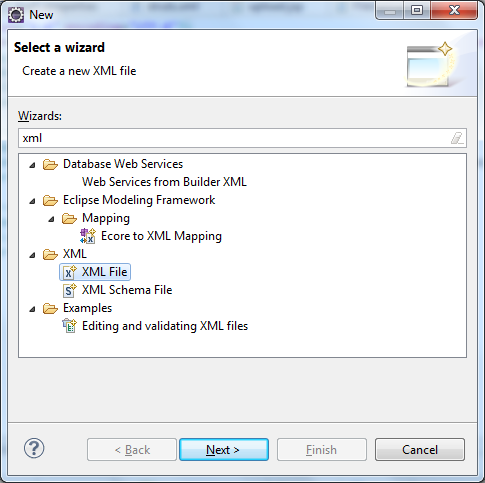
Click Next. In the New XML File screen, type struts.xml into the field File proper noun:
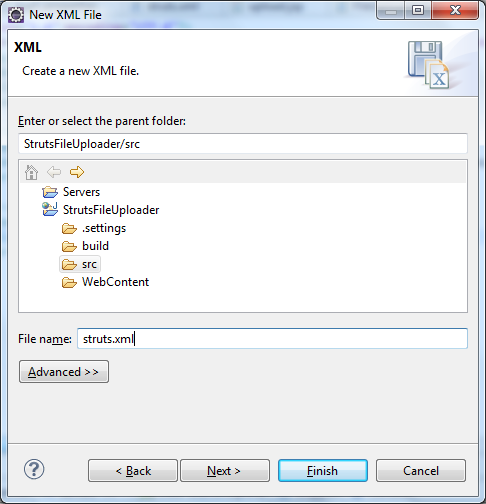
Click Finish. Copy and paste the following content into the struts.xml file's editor:
<?xml version="one.0" encoding="UTF-viii"?> <!DOCTYPE struts PUBLIC "-//Apache Software Foundation//DTD Struts Configuration 2.0//EN" "http://struts.apache.org/dtds/struts-two.0.dtd"> <struts> <constant proper noun="struts.multipart.maxSize" value="10485760" /> <package name="fileUpload" extends="struts-default"> <activity proper name="uploadFile" course="com.struts.upload.FileUploadAction" method="doUpload"> <interceptor-ref name="fileUpload"> <param proper noun="allowedTypes">image/jpeg,epitome/png,image/gif</param> <param name="maximumSize">4194304</param> </interceptor-ref> <interceptor-ref proper noun="params" /> <interceptor-ref name="validation" /> <interceptor-ref name="workflow" /> <result proper name="success" type="redirect">/upshot.jsp</consequence> <outcome name="input">/upload.jsp</issue> </action> </package> </struts>
This needs some explanation:
- The constant struts.multipart.maxSize specifies maximum size of a multipart request (in bytes). That is for the size of the whole HTTP request, not for an individual upload file.
- We define only action for handling file upload which is named as uploadFile; the implementation form is FileUploadAction under package com.struts.upload; the method will be invoked is doUpload().
- The activity volition handle requests coming from the upload.jsp page, equally specified in the last <result> tag.
- The upload is processed by a Struts interceptor called fileUpload. In this interceptor we specify two parameters:
-
-
-
-
-
-
-
-
- allowedTypes : as the name suggests, this parameter specifies which file extensions are allow for uploading. Hither we specify only image files.
- maximumSize: specifies maximum size of an individual file which tin can be uploade. Note this parameter is very unlike than the parameter struts.multipart.maxSize which is for the whole multipart request.
-
-
-
-
-
-
-
- The three other interceptors params, validation and workflow are required for processing the multipart request.
- Finally the activeness will redirect to the issue.jsp folio if the upload succeeds, as specified in the offset <result> tag.
In the next department, we will implement the action form FileUploadAction, merely allow's creating an upload course commencement.
6. Code file upload form
We are almost to create a HTML class that allows user to selection up a file to upload.
Right click on WebContent folder, select New > JSP File from context menu. In the New JSP File dialog, type upload.jsp into File name field. Click Finish.
Copy and paste the following lawmaking into the upload.jsp file's editor:
<%@ page language="coffee" contentType="text/html; charset=utf-8" pageEncoding="UTF-viii"%> <%@ taglib prefix="due south" uri="/struts-tags" %> <!DOCTYPE html PUBLIC "-//W3C//DTD HTML 4.01 Transitional//EN" "http://www.w3.org/TR/html4/loose.dtd"> <html> <head> <meta http-equiv="Content-Type" content="text/html; charset=ISO-8859-1"> <title>Struts2 File Upload Demo</title> </caput> <body> <center> <h1>File Upload with Struts 2</h1> <south:grade action="uploadFile" enctype="multipart/grade-data" method="post"> <due south:file proper name="fileUpload" label="Select a file to upload" size="xxx"/> <br/> <s:submit value="Upload" /> </southward:form> </center> </body> </html>
As we tin encounter, the upload form is created by using the Struts tag <s:form> with some interesting stuff:
- The form's activeness is "uploadFile" which match the proper noun of the action defined in struts.xml file.
- The enctype parameter must be "multipart/form-information" for a request which contains file upload data.
- The Struts tag <s:file> is equivalent to HTML's tag <input type="file" /> which displays a text box and a Browse button for the user to pick up a file.
- The Struts tag <s:submit> is equivalent to HTML'south tag <input type="submit" />.
Next, we will write code for the action class.
7. Code Struts action form
We are going to write code for the action class which is responsible for receiving request from upload.jsp page, copy the uploaded file to desired directory, and finally redirect to the effect.jsp page.
Nether src binder, right click on the package com.struts.fileupload, select New > Class. In the New Java Class dialog:
- Type FileUploadAction into the field Name.
- In the Superclass field, click Browse push button. Blazon ActionSupport in the dialog Superclass selection, and select the ActionSupport – com.opensymphony.xwork2. Click OK. Nosotros accept selected a superclass for the FileUploadAction class.
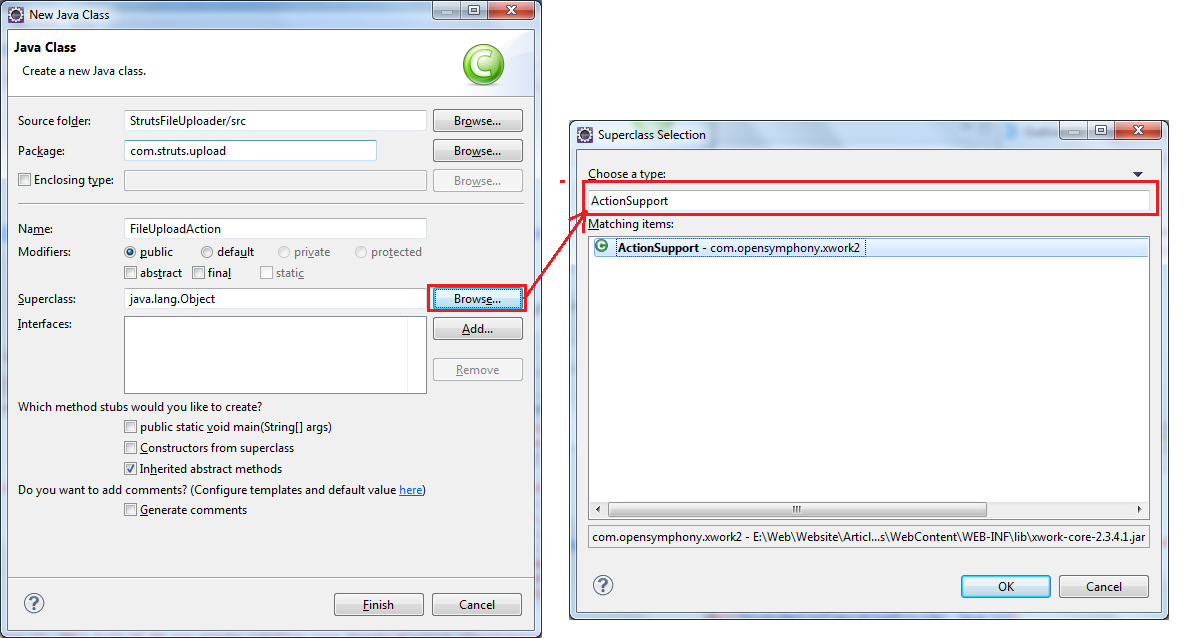
- Click Terminate.
Copy and paste the following code to the FileUploadAction.java file's editor:
package com.struts.upload; import java.io.File; import coffee.io.IOException; import org.apache.commons.io.FileUtils; import com.opensymphony.xwork2.ActionSupport; public class FileUploadAction extends ActionSupport { private File fileUpload; individual String fileUploadFileName; private String fileUploadContentType; public String doUpload() { File saveFilePath = new File("E:/Upload/" + fileUploadFileName); endeavour { FileUtils.copyFile(fileUpload, saveFilePath); } catch (IOException ex) { Organisation.out.println("Couldn't save file: " + ex.getMessage()); } render SUCCESS; } public String getFileUploadContentType() { return fileUploadContentType; } public void setFileUploadContentType(Cord fileUploadContentType) { this.fileUploadContentType = fileUploadContentType; } public String getFileUploadFileName() { render fileUploadFileName; } public void setFileUploadFileName(String fileUploadFileName) { this.fileUploadFileName = fileUploadFileName; } public File getFileUpload() { return fileUpload; } public void setFileUpload(File fileUpload) { this.fileUpload = fileUpload; } } In guild for the interceptor fileUpload can transfer data nearly the uploaded file, the activeness class must declare iii pairs of getter and setter:
- getFileUpload() and setFileUpload()
- getFileUploadFileName() and setFileUploadFileName()
- getFileUploadContentType() and setFileUploadContentType()
These pairs of getter and setter are for 3 variable fileUpload, fileUploadFileName and fileUploadContentType, respectively. The variable fileUpload refers to the actual uploaded file.
The method proper name doUpload must lucifer the parameter method of the activity defined in struts.xml file. Since uploading file is really done by the interceptor, mission of the activity class is very unproblematic: just re-create the uploaded file to another file. In the in a higher place code, we copy the uploaded file to the directory Eastward:/Upload on the server.
Finally, the action course returns a SUCCESS folio which maps to the result.jsp page defined in the struts.xml file.
Next, we will create the result.jsp page.
8. Code upload result page
Correct click on WebContent folder, select New > JSP File from context card. In the New JSP File dialog, type result.jsp into File name field. Click Terminate.
Copy and paste the following code into the result.jsp file's editor:
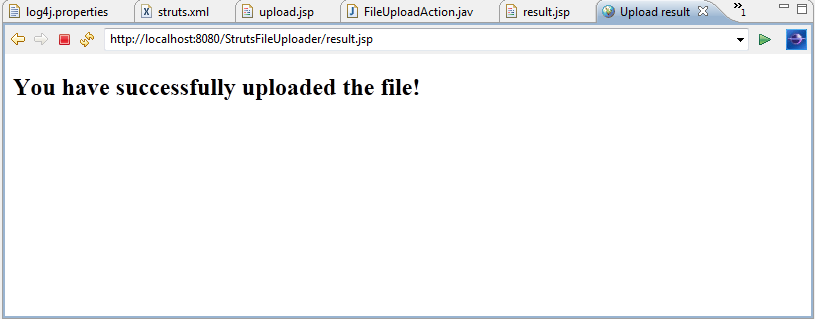
<%@ page language="java" contentType="text/html; charset=utf-eight" pageEncoding="UTF-viii"%> <!DOCTYPE html PUBLIC "-//W3C//DTD HTML iv.01 Transitional//EN" "http://world wide web.w3.org/TR/html4/loose.dtd"> <html> <caput> <meta http-equiv="Content-Type" content="text/html; charset=ISO-8859-1"> <title>Upload outcome</title> </head> <body> <h2>You have successfully uploaded the file!</h2> </body> </html>
Purpose of the result.jsp page is fairly simple: merely tell the user that the upload is successful.
Finally, the projection construction should await like this:
9. Test the Struts File Upload application
And so far we have finished all the coding role. It'due south fourth dimension to test out the application.
In Project Explorer view, nether WebContent, right click on upload.jsp folio, select Run As > Run on Server. If Eclipse displays the Run on Server dialog, select Choose an existing server and Tomcat v7.0 Server at localhost.
Eclipse starts Tomcat server and opens its internal browser window to launch the upload.jsp page:
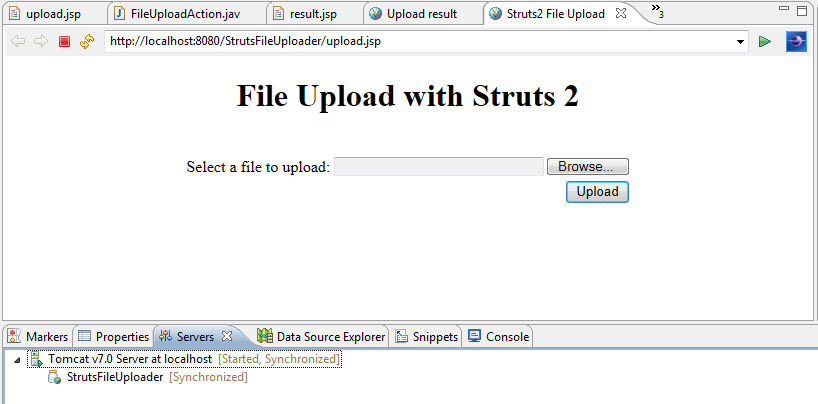
Click Browse button to choice a file and click Upload. The file will be uploaded to the server and the server redirects to the result.jsp page:
Check if the file is really uploaded to the directory Due east:/Upload.
Note: As specified in the struts.xml file:
- The allowed file types are: jpeg, jpg, png and gif.
- The maximum size for an individual file is 4MB (4,194,304 bytes).
So you tin can tweak these parameters to suite your need in struts.xml file.
Other Struts Tutorials:
- Introduction to Struts ii framework
- Struts beginner tutorial (Eclipse + Tomcat + XML)
- Struts Beginner Tutorial with Annotations
- Struts beginner tutorial with Convention Plugin (zero-configuration)
- How to handle exceptions in Struts
- Struts Form Handling Tutorial
- Struts Form Validation Tutorial
- Ship email with attachments in Struts
- Struts File Download Tutorial
- Struts - Bound - Hide Integration Tutorial
Well-nigh the Writer:
 Nam Ha Minh is certified Java programmer (SCJP and SCWCD). He started programming with Java in the time of Java 1.4 and has been falling in love with Java since and so. Make friend with him on Facebook and watch his Java videos you YouTube.
Add annotate
Source: https://www.codejava.net/frameworks/struts/upload-file-with-struts-2
0 Response to "View Apache Struts Jar File File Upload"
Post a Comment